In the previous post I started to refine a small project to demonstrate how a .NET Core cloud application benefits from having multiple layers of testing. The first and largest of those layers should always be unit tests. They’re the first line of defense against bugs, they challenge us to think differently about our code, and they make it easy to understand what a class does.
There are tons of articles out there on how to do unit testing in .NET Core, so you may be wondering what’s different about this one. The focus here will be on how to structure unit tests from a folder, file and class structure perspective as well as what should and shouldn’t be tested. We’ll quickly go over the available tooling options and wrap it up by looking at why unit tests aren’t enough to ensure an application is fully functional.
Where To Learn About Unit Testing and TDD
It’s possible you’ve fallen on this article without the slightest idea of what unit testing is. There are many articles, books, and videos that do an amazing job at explaining the concepts in detail so I won’t re-hash them here. Instead, here are some of my favourite resources when I was first learning about these topics.

- Kent Beck’s classic book on the subject is as good a place as any to start.
- Growing Object-Oriented Software, Guided By Tests does a great job of giving you the big picture as well as the details of unit testing.
- The entire series on TDD at Clean Coders (hosted by ‘Uncle Bob’ Martin) will be of interest if you prefer video training.
- The place to start for .NET Core unit testing is Microsoft’s own documentation.
These resources are mainly focused on TDD. Learning about unit testing is a lot easier within the TDD paradigm because it gets you to think about your code in a radically different way. TDD can get a bit pedantic once you understand its concepts. You’ll become the judge of the situations where it’s useful. Don’t feel chained by its rules at all times.
Organizing Unit Tests Within A .NET Core Project
There are two generally accepted ways of organizing unit tests in .NET. The first option is to name the test assembly identically to the production code assembly with a “.Tests” appended to the end of the name. The advantage of this strategy is that it keeps the tests as close as possible to the production code without being part of the final release build. The downside to this approach is that it can make for a cluttered view in a project that has many assemblies.
The second option, which can be seen in the Supermarket project, is to have the unit test assemblies in a separate folder from the production code.
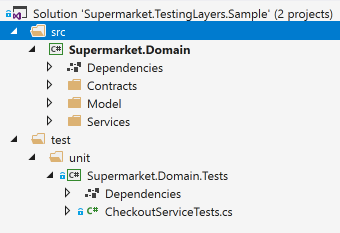
This makes it a bit harder to match up the assemblies but keeps all the tests grouped together in a concise fashion. I’ve made a small modification by creating a sub-folder called “unit” where the unit test assemblies are located. This will make it easy later on to find all tests for a given layer.
It’s time to start writing some tests once the folder structure is in place. The traditional approach is to have one test class per production class, with all the test methods inside that single test class. This works well enough, but I’ve found Phil Haack’s test structure to be a the clearest approach. Each production class being tested has an equivalent test class, and each class method has a nested test class for its related tests. I used this strategy to test the CheckoutService. Here’s a small sample of what those tests look like:
public class CheckoutServiceTests

{

    private readonly CheckoutService _sut;

    private readonly Mock _mockCart;

    private readonly Mock _mockTaxCalculator

    private readonly double _taxAmount = 1.15;

    private readonly string _mockPostalCode = "H1Z 2B4";

    public class CheckOut : CheckoutServiceTests

    {

         [Fact]

         public void GivenCart_WithInvalidPostalCode_ThrowsException()

         {

             Assert.ThrowsAsync(() => _sut.Checkout(null));

         }

         [Fact]

         public async Task GivenNoItemsInCart_ThenCartCostIsZero()

         {

            _mockCart.Setup(c => c.Get()).Returns(new CartItem[0]);

            _mockTaxCalculator

                 .Setup(tc => tc.Apply(It.IsAny(), It.IsAny()))

                 .Returns(Task.FromResult(0d));

            var actual = await _sut.Checkout(_mockPostalCode);

            Assert.Equal(0, actual.PreTax);

            Assert.Equal(0, actual.PostTax);

     }

}
Let’s move on to naming tests. There are lots of opinions on the matter and they all have their own merit. My preference is towards the BDD style of “Given/When/Then”. The “When” part of the name can be skipped unless there is a specific internal state being tested, making it more of a “Given/Then” format. Here are a few example names from the tests of the Receipt class:
- GivenEmptyCart_ThenReceiptIsEmpty
- GivenItemsInCart_ThenReturnsReceiptItems
- GivenItemsInCart_WhenCalculatingTax_ThenPostTaxAmountIsGreaterOrEqualThanPreTaxAmount
- GivenMultipleItemsInTheCart_ThenPreTaxCostIsTotalOfAllItems
Here’s a list of the most popular options for naming tests. And if you don’t like any of those, Microsoft’s guidelines are publicly available also.
A small point about naming the class being tested. The most widely accepted standard is to call it “_sut” (short for system under test). It’s a great shorthand that also makes it clear what’s being tested. In classes where there are two or more classes being mocked out, having the “sut” clearly identified goes a long way to improve clarity.
What Should and Shouldn’t Be Unit Tested
Most of the components of an application should be unit tested. In fact, there’s only a few cases that shouldn’t be. As a rule of thumb, assume that everything needs to be tested unless there’s a class that can’t be tested without its dependencies. Here’s a list of a few things that I tend to write little to no unit tests for:
- Constructor null argument checks. The dependency injection framework hooks up the dependencies for a class, and if one of them can’t be resolved, it’ll throw an exception anyway.
- API Clients. Client classes are very thin with only low level code in a well-architected solution, to the point that they are nothing more than a passthrough to the API they are interogating. There should be no business logic whatsoever in them.
- Methods or properties that do nothing other than return a value. These are unlikely to break when refactoring so writing a unit test for them brings little to no value.
Tooling for .NET Core
The same three testing frameworks (MsTest, NUnit, XUnit) that are popular in .NET Framework can also be used in .NET Core projects. For the longest time MsTest features lagged behind NUnit and XUnit. It’s done a good job of catching up in its latest incarnation. Stick to what you’re used since there isn’t much to chose between them.
In terms of mocking frameworks, Moq is the de-facto standard. NSubstitute is a popular option as well. Unfortunately, fans of RhinoMocks are left out in the cold with .NET Core since no one is actively maintaining the project anymore. Moq and NSubstitute both get the job done so again go with what you’re familiar with.
Whatever combination of tools you decide to use, make sure that your unit tests are configured to run once on every build of your project. Unit tests run quickly (within a few minutes at the absolute most), and are the first step towards moving to a fast and reliable continuous deployment pipeline.
Why Unit Tests Aren’t Enough
Unit tests are a necessity. They allow you to test individual components of your production code in a controlled environment. This in turn enables developers to see avoidable mistakes before ever trying to run the application. And while some tests can take a while to get right, that cost is incurred only once and benefits the application for the lifetime of the code.
The strength of unit tests is also their greatest weakness. Testing in isolation makes it easy to provide different inputs to a test and look for the expected behaviour. But how do we make sure that the individual components work together? And more importantly, how do we know that they work together once deployed to a web server, Platform-as-a-Service or container? This is the role of the acceptance tests layer, which we’ll review in the next article of the series.

One comment